
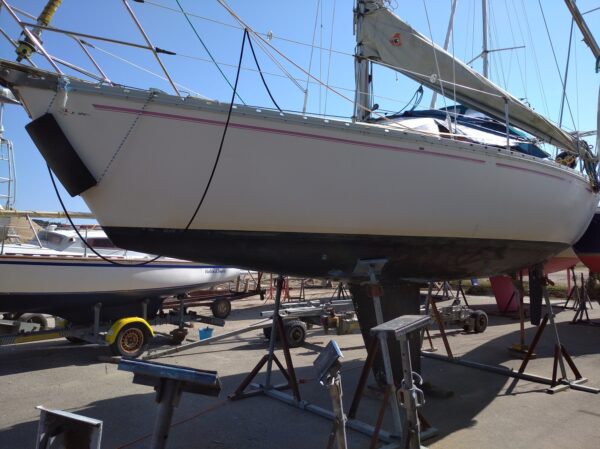
Cleaning and maintaining your boat’s hull must be done regularly so that it stays clean and does not deteriorate too quickly. Beyond avoiding sailing with a yellowish hull, the aim of this guide is above all to take advantage of hull cleaning to get ahead of major problems by repairing small damage. Here are a few tips for cleaning and maintaining your boat’s hull.
We all want to sail on a clean boat, with a bright white hull, with no rust stains, slime, or yellowing caused by time. But there is no secret to achieving this. You must take care of your boat’s hull and clean it regularly. Together, we will look at a few good habits to adopt for cleaning and maintaining your boat’s hull. At the same time, we will see how to repair small damage: gelcoat chips or fibre repairs. Indeed, regular cleaning and maintenance of your topsides, in addition to your annual slipping, is essential to preserve the lifespan and appearance of your sailboat, or motorboat for that matter.
The 3 Steps for Cleaning Your Boat’s Hull
Let’s start with basic cleaning. This must be done regularly. And you are not obliged to go to a berth and connect to fresh water to do so. You can perfectly well clean your hull regularly with a sponge and seawater. Regularly, I go around my boat with the dinghy to clean the algae along the waterline and the various greasy marks and other stains. I do this during a stopover or at anchor, for example.
However, you should take advantage of one or two moments during the year to clean your boat’s hull more thoroughly.
Before starting the actual cleaning, it is important to ask yourself a few questions:
- What is the hull material of my boat? (Polyester, aluminium, wood…)
- What types of dirt do I want to remove? (Limescale, algae, rust, salt…)
- How often should I clean the hull?
Once these points are clarified, follow these steps to clean your boat’s hull effectively:
Gather the necessary equipment:
- A cleaning product suitable for your boat’s hull
- A bucket of fresh water
- A low-pressure water jet
- A sponge or cloth
- Protective gloves
Warning: Do not use hydrochloric acid or undiluted products.
Apply the cleaning product:
- Dilute the product according to the manufacturer’s instructions, taking into account the level of dirt and the specific features of the hull.
- Apply it with a sponge or a sprayer over the entire surface to be treated.
- Leave it on for about 15 minutes for yellowing stains and a few minutes for weekly cleaning.
Rinse with fresh water:
Use a low-pressure water jet to rinse your boat’s hull thoroughly. Avoid doing this in full sun, as the water and the product may dry quickly.
Wipe with a clean sponge:
Then go over the entire surface with a clean sponge soaked in clear water to remove any residual marks. Let it dry naturally.
Removing the yellowing of the hull

After several years of use, it is possible that your polyester boat’s hull shows yellowing stains caused by limescale.
You will therefore need to remove the yellowing from your boat’s hull, especially above the waterline. The longer you wait, the more difficult it will be, and the more elbow grease it will require.
To remedy this, use oxalic acid diluted in clear water, after following the previous steps to clean the hull. Apply this solution to the affected areas and rinse thoroughly with fresh water.
There are very effective products for removing hull yellowing, such as CleanBoat. I have tested it, and it really works.
Polishing a boat’s hull
This operation is not carried out every year. Polishing a boat’s hull means renovating the gelcoat through polishing. The goal is to restore the hull’s shine. This operation will be needed more frequently on coloured hulls (such as the blue or yellow of Bénéteau First boats, for example). To polish a polyester boat’s hull, follow these steps:
- Initial cleaning: Before polishing, make sure the boat’s hull is clean. Use a gentle cleaner to remove dirt, salt residue and other contaminants.
- Damage inspection: Examine the hull to detect any scratches, scuffs or damaged areas that may require repairs before polishing.
- Choice of polish: Select a polish specially designed for polyester boat hulls. Make sure it does not contain overly aggressive abrasive components that could damage the surface.
- Applying the polish: Apply the polish to small sections at a time using a foam pad or an electric polisher. Follow the manufacturer’s instructions for best results.
- Polishing: Use circular movements with moderate pressure to polish the surface. Make sure you cover the area evenly and do not stay too long in the same spot to avoid any overheating.
- Wiping: Once the polish has been properly applied and worked in, wipe off the excess with a clean, lint-free cloth. Repeat the process over the entire hull.
- Finishing: For an optimal finish, you can apply a marine wax after polishing to protect the hull and prolong its shine.
Repeat this polishing process periodically to maintain the hull’s shiny appearance and prevent the build-up of dirt. If you are unsure of the method to follow or if significant damage is present, it is recommended to consult a professional boat maintenance specialist.
Slipping and annual hull maintenance
Finally, and here I am addressing beginners, to keep a hull in good condition, an annual maintenance operation called “slipping” is essential. It involves cleaning the underwater hull, the submerged part of the hull, to remove the algae and shells that have attached themselves to the hull. Then, you will need to redo your antifouling. This operation involves taking your boat out of the water and carrying out the following work:
- Cleaning the hull with a high-pressure cleaner
- Scraping difficult areas with a spatula or a wire brush
- Sanding the surface with a fine abrasive
- Applying antifouling paint to slow the growth of algae and molluscs
- Checking and, if necessary, repairing the submerged parts of the boat (underwater hull)
By following these tips and regularly maintaining your boat’s hull, you will preserve its performance, lifespan and appearance for many years.
Repairing small damage to the hull
The first habit to adopt, in order to maintain your boat’s hull, at the end of each season, is to go around the hull to spot any small chips and small cracks that need repairing. These small repairs can be carried out yourself. If the cracks seem more structural to you, or if you have any doubt, call in a professional. To repair these small chips, you can use two different products. These products are fillers. These fillers are ready-to-use pastes for repairing shallow chips. They are composed of a filler and a resin. Generally, they are sold in chandleries in two parts, a base and a hardener. :
- For small jobs located above the waterline, use polyester resin.
- For small jobs located below the waterline, use epoxy resin, which has the advantage of being waterproof.
Polyester-based filler can also be used for work on the deck.
These small jobs on the hull are very simple to carry out, but if, like me, you are not much of a handyman, you should do this work in dry weather. The idea is to:
- clean the area to be repaired
- sand the crack
- apply the filler and let it dry
- sand the repair to make it smooth
- paint the repair
Renovating the gelcoat
Beyond structural repairs and the season’s chips, it is important to clean your boat’s hull. When I talk about hull cleaning, I obviously mean slipping the underwater hull, but also cleaning the topsides. Indeed, the sun, salt and bad weather will tend to yellow your hull. At the same time, your hull will become marked with black streaks, caused by pontoons, the dinghy or neighbouring boats.
There are many products for cleaning your boat’s hull. Avoid polluting products. There are now very effective eco-friendly boat maintenance products available.
If your boat’s hull gelcoat starts to lose its shine, you can renovate your gelcoat by polishing and buffing it. This operation requires a bit of time, and mild weather if your boat sleeps outdoors. But gelcoat renovation is within everyone’s reach.
Stripping a sailboat’s hull
Finally, the last habit to adopt, in order to maintain your boat’s hull, is to do your slipping properly. That is, taking care of the layers of antifouling. Indeed, your boat’s hull antifouling is redone at each slipping, generally every year. However, due to lack of time, or for environmental reasons, we tend to add a layer of antifouling on top of the old layer. Of course, we sand the first layer, but we do not remove it. This is especially the case for hard-matrix antifoulings.
So a time comes when all these layers build up. It will then be necessary to strip the hull. This stripping cannot be done by sanding. You will not manage to remove the old antifouling that way. You must scrape off all these layers. This work is simple but physical, as you work under the hull and will sometimes have to bend in every direction. With a standard paint scraper, you will remove all the antifouling flakes down to the gelcoat.
Take the opportunity to let your hull breathe and check, here again, that your underwater hull is sound.
To sum up, taking care of your hull is obviously