
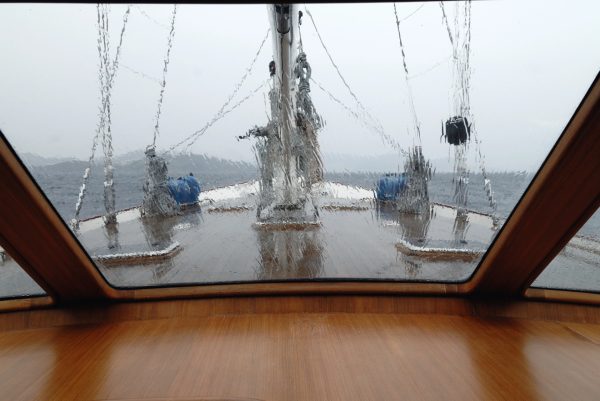
There is always a particular smell floating around a sailboat that takes in water from the rain. A smell of bilge, damp fabric, of wood that is working. And often, this is not a matter of leaks, but of freshwater infiltrations, slow and insidious, that find their way in through the portlights, deck hardware fastenings, the anchor locker or the mast partners at every rainy episode. They will not sink the boat (although…). But in the long run, these water entries destroy the deck, rot the deck linings, corrode the electrical equipment and ruin liveability.
This dossier proposes to help you identify the classic entry points, locate the leak, repair it temporarily while waiting for more extensive work, and then adopt the good habits that delay the appearance of these defects.
Key takeaways
- Freshwater entries account for the vast majority of infiltrations on a pleasure sailboat. They travel through the deck penetrations (stanchions, cleats, rails, cable glands, portlight screws) and through the hull-to-deck joint.
- An infiltration is never repaired from the surface, from the inside: the water circulates between the deck and the deck lining, and reappears far from its entry point.
- The most effective location method remains the zone-by-zone water jet test, portlight by portlight, fastening by fastening, placing paper towel or newspaper under the suspect points.
- The king product for temporary repairs is marine polyurethane sealant (Sikaflex 291 type), applied to a clean, dry and degreased surface.
- A weeping hull-to-deck joint is the only case that almost systematically justifies the intervention of a boatyard: it is a big job, but a silicone touch-up will only mask and aggravate the problem.
The classic infiltration points on a sailboat
Let us start by going back to the source, it is the case to say so. The deck of your sailboat is a surface pierced with dozens of openings, and every hole is a potential entry point for rainwater. So let us begin by listing the usual suspects, from the most benign to the most troublesome.
The portlights
This is suspect number one, and for good reason: portlights, fixed with screws and a seal, continuously endure UV, temperature variations and vibrations. The seal hardens, cracks, and water seeps in between the plexiglass and the frame, then makes its way to the screw threads. On somewhat older units equipped with large overhead portlights, the phenomenon is almost systematic after about ten years. Another classic trap: a loosened fixing screw, or a peeled-off protective film that creates a channel conducting water right to the screw thread.

Stanchions and deck hardware fastenings
Cleats, genoa track, winches, fairleads, backstay, stanchions: everything that is bolted to the deck is a penetration. The problem rarely comes from the bolt itself, but from the bedding of sealant originally laid between the base and the deck. Over the years, this sealant shears, hardens, retracts. Water then forces its way in by capillarity along the threaded rod, and trickles under the deck covering. Stanchions are particularly exposed: they take the loads of the shrouds, work in flexion on every tack, and progressively lift their seal.
Cable glands
The passage of cables (navigation lights, mast foot lighting, coachroof instruments, mast electronics) is often done through a simple rubber cable gland or through a penetration filled with sealant. The rubber ages, shrinks, and the sealant eventually comes away from the cable or the gelcoat. It is a discreet leak, often discovered too late: the water follows the cable and goes straight to the electrical connections, in a switch panel or behind a panel.
The anchor locker
Being an opening onto the deck by definition, the anchor locker takes in litres of rainwater at every downpour, on top of the constantly wet chain and anchor. Everything depends on its drainage: a bottom drain that is often small, poorly located on the side, and which clogs with the remains of mud and silt from the chain. When the drain is obstructed, the locker behaves like a basin, overflows into the anchor locker, then the water escapes through the fastenings of the windlass, the lid screws or the panel seal. Worse: on some boats, it trickles under the deck lining all the way to the keel trunk, perfectly imitating a water entry through the hull.
The mast partners
The passage of the mast through the deck is a highly exposed zone. On a keel-stepped mast (deck-passing partners), rainwater naturally runs down the mast and ends up directly inside the boat, in the cabin. On a deck-stepped mast, it is the seal of the mast collar or the sealant between the mast step and the deck that ages and gives way. The loads of the rigging, the tension adjustments and the movements of the mast under way progressively shear the watertightness. The repair is in principle done with a flexible collar (fabric or neoprene) whose upper end remains open to let out the water running down the mast: the goal is not to prevent the water from coming down, but to direct it outside.
The hull-to-deck joint
This is the most troublesome case. Hull and deck are assembled with a bonded joint (sealant, Sikaflex or composite), sometimes reinforced by a screwed or riveted rubbing strake. This joining joint works relentlessly: flexing of the hull in the waves, rigging loads, crushing of the coachroof. When it fails, rainwater seeps in at the interface, between the two structures. The typical symptom: water appearing in the side lockers, behind the panels, at the transom, often far from the actual entry point. On older units with a bolted rubbing strake, every bolt is an additional penetration, and removing the strake becomes inevitable to redo the watertightness properly.
How to find the leak?
This is the most frustrating step, because water is cunning: it runs along the deck linings, bulkheads and electrical conduits before making itself visible. The puddle at the bottom of the bilge may come from a portlight three metres higher up. The search therefore requires method, and above all not rushing to the first damp spot you find.
Before you start
Start by eliminating the other possible sources of fresh water: freshwater circuit (tank, pump, piping), heavy condensation on the fridge or engine bulkhead, residual seawater. A simple test settles the matter: drip a little water from the puddle onto your tongue or let it dry on a black surface — rainwater has neither the salty taste nor the crystallised salt deposit of seawater. Be careful, however, with mixed contamination (wet chain, seawater carried up through the anchor locker).
The zone-by-zone method
The most effective and least costly technique remains the hose test, carried out sector by sector, on a windless day:
- Dry the interior thoroughly, place paper towel or newspaper under each suspect zone (portlight edges, under the stanchions, under the cable glands, in the lockers): the paper marks the slightest drop and keeps a trace of it.
- Spray one single zone at a time, starting from the bottom of the coachroof and deck, then working upwards. Wait ten to fifteen minutes between each zone.
- As soon as a trace appears, note the zone: you have just narrowed it down to a sector, not yet to the exact point.
- In the identified sector, spray fastening by fastening, following a strict order.
The right reflex is to never spray the whole deck at once: you would get ten simultaneous traces, and no conclusion.
The clues that give away the entry point
Certain signs spare you lengthy searches:
- Limescale marks or grey streaks on a mast, a rubbing strake or a gelcoat: water has already run there many times.
- Corrosion on a bolt, cracked gelcoat joint around a base: the leak is often just below.
- Dampness or mould under the deck covering: the water is entering through a neighbouring fastening and spreading under the deck.
- A localised damp smell in a locker after rain: follow the trail the day after the downpour, it is the best moment to spot the trickles. Dampness on board a boat must be dealt with quickly.
- Checking the drains: anchor locker, cockpit and coachroof drains, chain passages. A puddle that persists in an anchor locker after the rain points to its drain, not to its wall.
Special case of the hull-to-deck joint
If the water appears in the side lockers or at the transom, place containers along the hull-to-deck junction, on the inside, and observe after each rainfall: this is the simplest way to confirm that the joint is at fault. Once this diagnosis is made, be aware that a surface repair will not be enough: the water circulates in the interface, and one often has to wait for a complete refit to get rid of it.
Repairing it yourself: temporary solutions that hold
While waiting for a full refit, several interventions are within the reach of a careful boat owner. They do not replace a complete redoing of the watertightness (disassembly, cleaning, fresh sealant bedding), but they dry the boat out for one or two seasons.
Marine polyurethane sealant, the king product
The reference product for these touch-ups is a marine polyurethane sealant of the Sikaflex 291 type: flexible, adhering to gelcoat, stainless steel, aluminium and plexiglass, resistant to UV and seawater, it accepts vibrations and the working of the structures. It is the Swiss Army knife of watertightness on board. For the application:
- Degrease thoroughly with acetone (gelcoat, aluminium, stainless steel) or isopropyl alcohol (plexiglass, paints).
- Apply a continuous bead, smoothed with a spatula wetted with diluted washing-up liquid, taking care to drive out the bubbles.
- Never smooth an unprotected sealant with your finger and never work on a damp substrate: the adhesion will be ruined.
- Allow 24 to 48 hours of curing before any water test.
Three golden rules for the repair to hold:
- Never apply sealant over old sealant: strip everything, down to the sound substrate.
- Never reseal a penetration from the inside only: the water will keep circulating between deck and lining.
- Use neither acid silicone nor acrylic sealant: silicone cannot be painted over and prevents any future adhesion; acrylic disintegrates on contact with water.
Factsheet for each infiltration point
- Portlights: tighten the screws slightly (without excess, the plexiglass warps), then lay a bead of polyurethane around the frame and at the base of each screw. If the leak persists, complete replacement of the seal, or even of the portlight, is required: allow half a day per portlight.
- Stanchions and deck hardware: remove the fastening, clean the base and the deck, refit on a bed of fresh polyurethane sealant, with a slight overspill all the way around. Screw with moderate torque: crushing the sealant makes it ineffective.
- Cable glands: replace the cable gland, or create a sealant drip loop in a gooseneck shape around the cable, as the water running down the cable must always have its path broken before the penetration.
- Anchor locker: unblock and enlarge the drain if needed, drill a second drain if the first is poorly located, and check the seal of the lid or panel. A simple regular cleaning of the drain resolves a good share of cases.
- Mast partners: redo the sealant between the collar and the deck, and check that the collar does direct the water outwards. On a keel-stepped mast, fitting a new flexible collar is within the reach of a competent DIYer.
- Hull-to-deck joint: as a stopgap, a bead of polyurethane along the rubbing strake, on the outside, can slow down the water entry. It is only a sticking plaster: the proper repair requires removing the strake and a complete bonding-and-sealing of the interface, typically a boatyard job.
The mistakes to avoid
- Sealing the visible water entry from the inside without having treated the penetration on the deck side: the water stagnates in the structure and does even more damage there.
- Over-tightening a portlight screw to “compress” the seal: this creates a stress that cracks the plexiglass or the gelcoat.
- Using a silicone sealant as a permanent solution: everything will have to be stripped later, and it contaminates the substrates.
- Letting an infiltration linger: fresh water in the bilges is a breeding ground for osmosis, corrosion and mould, and a sandwich structure (balsa or foam deck) rots in silence with no outward sign.
The good habits that delay these leaks
The best repair is the one you do not have to make. A few simple habits, repeated every year, delay the appearance of these infiltrations by several years.
- Check the seals in spring and autumn: run your finger and eye over every deck fastening, every portlight frame, every bead of sealant. A seal that hardens, shrinks or cracks must be redone before winter, the period when stagnant water does the most damage.
- Tighten moderately the portlight and hatch screws once a year, after the first winter: freezing and thawing loosen the assemblies.
- Clean the drains and seacocks every spring: anchor locker, coachroof and cockpit drains, chain passages. It is the least glamorous and most profitable maintenance there is.
- Rinse and let dry the anchor locker and anchor stowage after every anchoring: chain mud, as it dries, blocks the drain.
- Test with fresh water after every intervention on the deck: a low-pressure hose jet on the repaired area, about twenty minutes after full curing, confirms the watertightness before relaunching.
- Protect the deck in winter: a properly tensioned cockpit cover or tarp, or a boat stored ashore, spares the seals months of rain.
- Never drill the deck without a bed of sealant: every new penetration (wind generator support, solar panel, rail) must be fitted on a bead of fresh polyurethane, never on silicone.
- Write down your interventions: a logbook of watertightness repairs, with dates and products, helps you anticipate the next refits — a polyurethane sealant is renewed roughly every ten years, a portlight seal every ten to fifteen years depending on exposure.
A freshwater entry is never an emergency. It is almost always a matter of method: observe after the rain, spray zone by zone, repair cleanly, start again every season. The boat owner who adopts this rhythm sails in a dry boat, and above all knows, when a puddle appears, exactly where to look. The others spend their winters mopping.